As one of the world’s most famous communication platforms, Facebook has transformed how we connect and share. However, if privacy and data tracking concerns have caused you to seek an alternative, knowing how to deactivate or delete your Facebook account is critical.
This comprehensive guide walks you through each procedure stage to help you stay on top of your online presence game.




Congratulations, you have successfully deactivated your Facebook account.






Step 3:
Under “Settings,” choose “See more in account centres.”
Step 6:
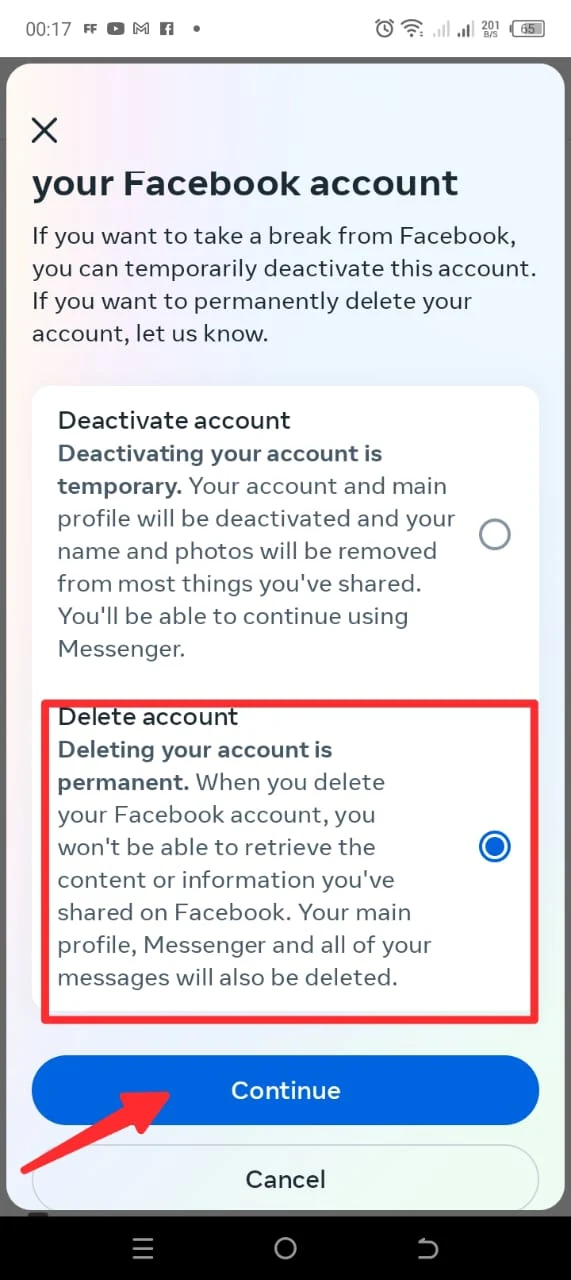
Choose the deleting option and hit the “Continue” button.
There you are; deleted your account in no time.



Well done, my friend, you have done this all by yourself.
Your account can be reactivated at any time.
Hide your stuff for the time being.
Oculus items are not available.
When reactivated, you are vulnerable to various scams.
Control over personal information has been enhanced.
All related data is erased.
Possible loss of critical media.
Keeping Messenger Active During Deactivation
Yes, you can use Facebook Messenger after canceling your account. Select the “Deactivate account” option to keep your communications capability intact.
As you navigate the realm of Facebook deactivation and deletion, consider your digital priorities and concerns. Whether you seek a temporary or permanent escape, this guide equips you with the tools to safeguard your online presence and privacy.
Read next: Delete Your Instagram Account with a Simple and Fun Guide
This comprehensive guide walks you through each procedure stage to help you stay on top of your online presence game.
Deactivate vs. Delete: What’s the Difference?
Before we get into the details, it’s crucial to understand the difference between deactivating and deleting a Facebook account. Deactivating your account gives you a temporary break from the site, whereas deleting it permanently deletes your profile and associated data.Deactivating Your Facebook Account
Whether you’re seeking a digital hiatus or contemplating a complete departure from Facebook, here’s how to navigate the process:Deactivation on Web Browser:
Deactivating Facebook on a web browser is simple and straightforward; all you need to do is follow the below steps.Step 1:
First, log into your Facebook account from the web browser by typing “www.facebook.com.”Step 2:
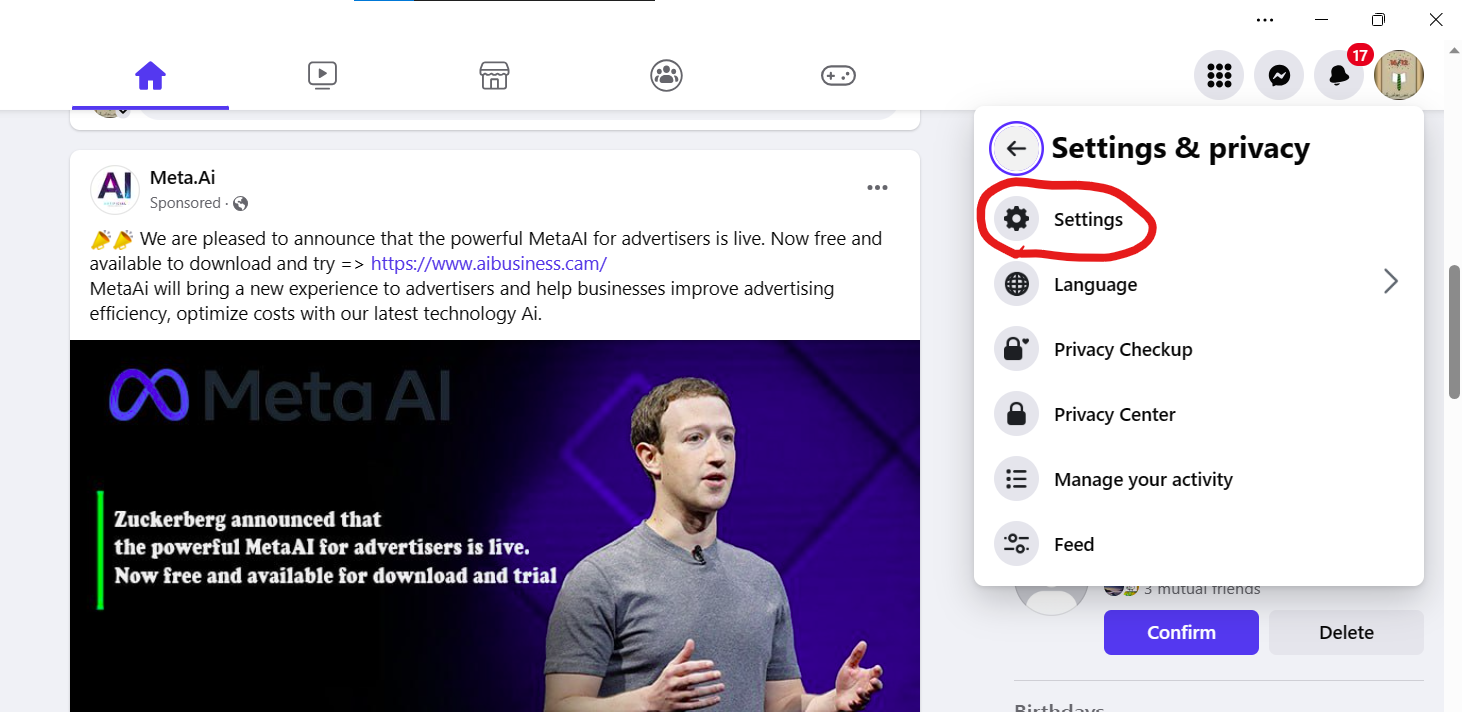
Navigate to privacy settings by clicking the profile picture at the top-right corner.Step 3:
By entering the privacy settings, you will see another “settings” option in the list. Click on that option.Step 4:
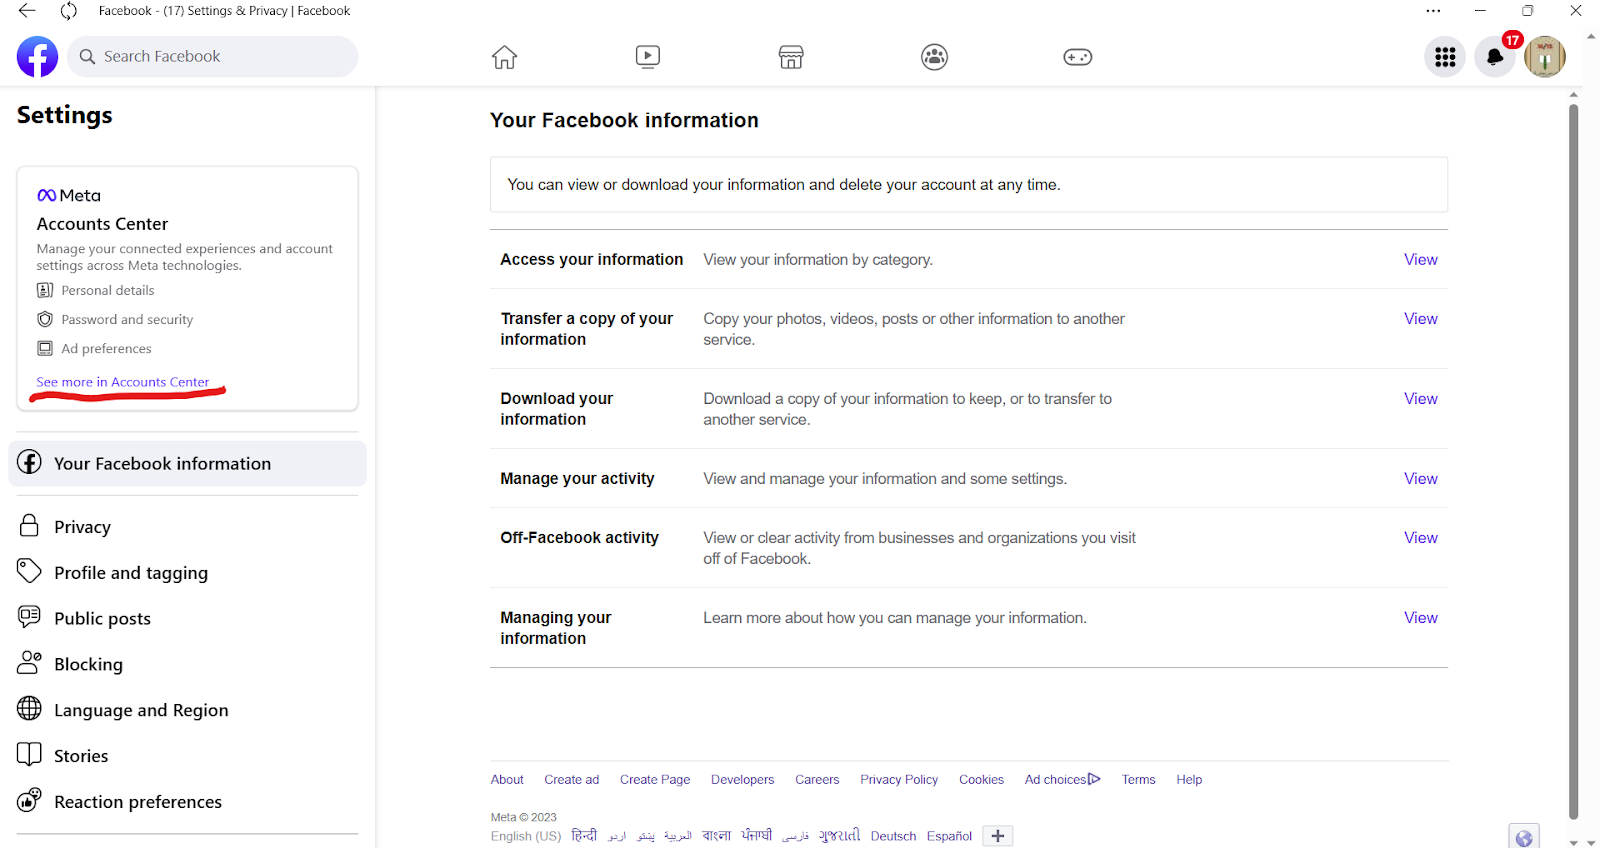
You will see the option of “Account centers” on the left side of the screen. Look closely, and you will find “see more in the account centers.” Tap this option.Step 5:
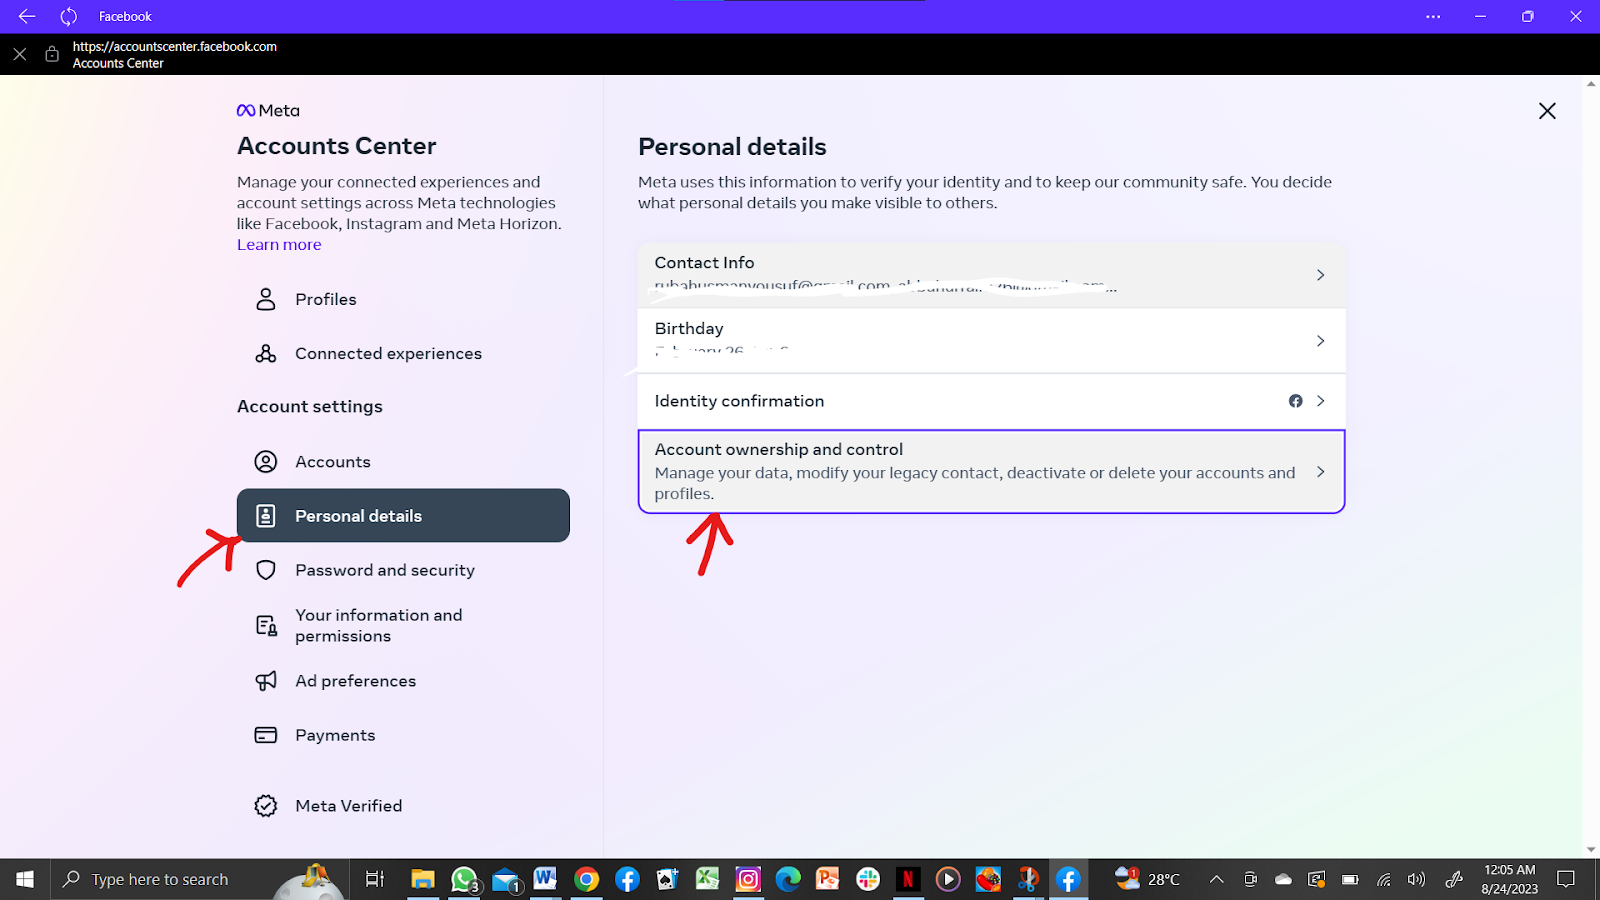
Now, a new window is opened. Look for the “Personal details” option amidst the list below and tap on it. In the personal details option, you will see “account ownership and control” at the bottom. Tap on this, too.Step 6:
Select the account for deactivation, and select the deactivating option.Step 7:
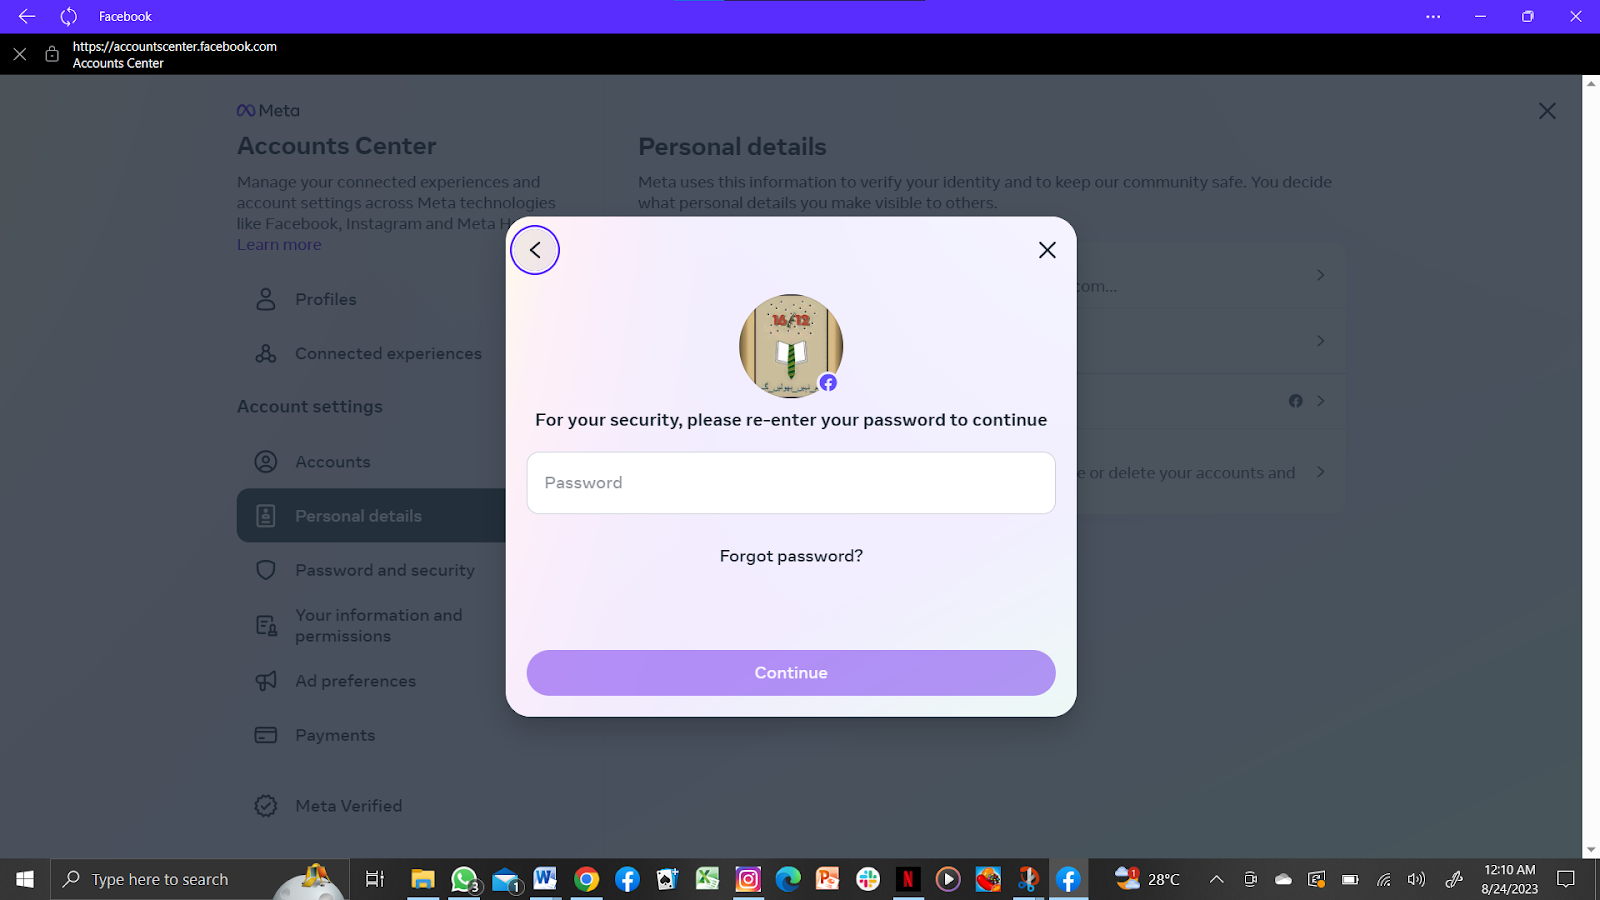
Enter your Facebook password to proceed with the deactivation process.Congratulations, you have successfully deactivated your Facebook account.
Deactivation on iPhone App:
Step 1:
Open the Facebook app on your iPhone.Step 2:
Tap the three horizontal menu lines and choose “Settings & Privacy.”Step 3:
You will see the “settings” option in it. Tap on it.Step 4:
You will see the option of “Account centers” on the left side of the screen. Look closely, and you will find “see more in the account centers.” Tap this option.Step 5:
Now, a new window is opened. Look for the “Personal details” option amidst the list below and tap on it. In the personal details option, you will see “account ownership and control” at the bottom. Tap on this option.Step 6:
Select the account for deactivation, and select the deactivating option.Step 7:
Enter your Facebook password to proceed with the deactivation process.Deactivation on Android App:
Deactivating your Facebook account on your Android phone is the same as doing it on other devices. Are you ready to explore the journey? Let’s dive straight into it:Step 1:
Launch the Facebook app on your Android phone.Step 2:
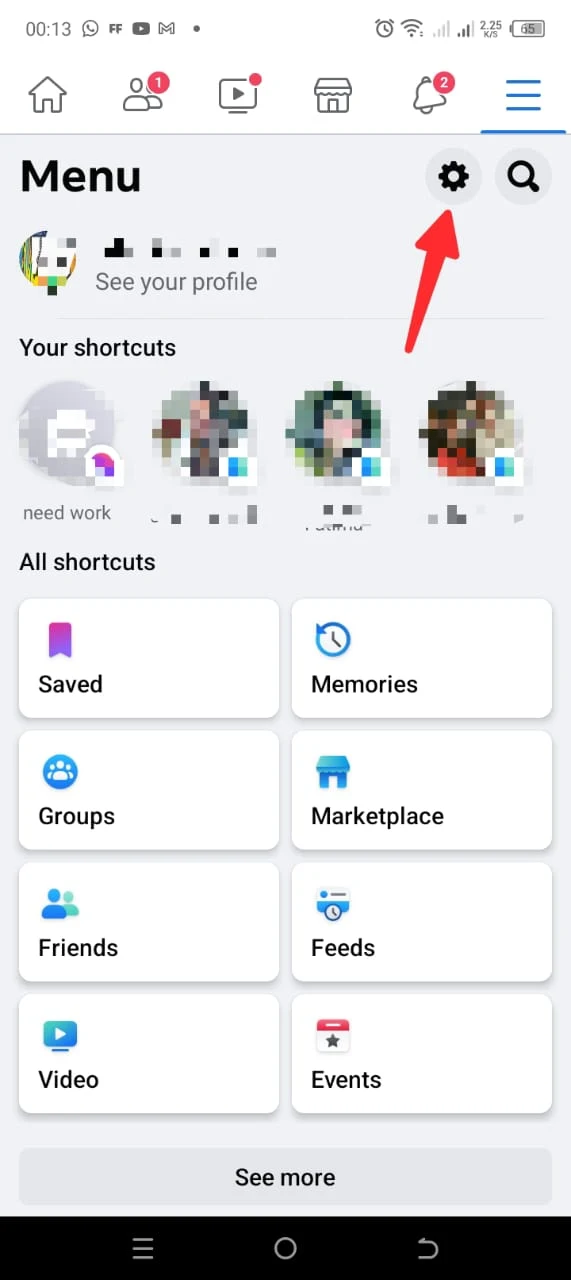
Tap the three lines of the menu at the top right menu.Step 3:
Now select the settings gear located at the top right corner.Step 4:
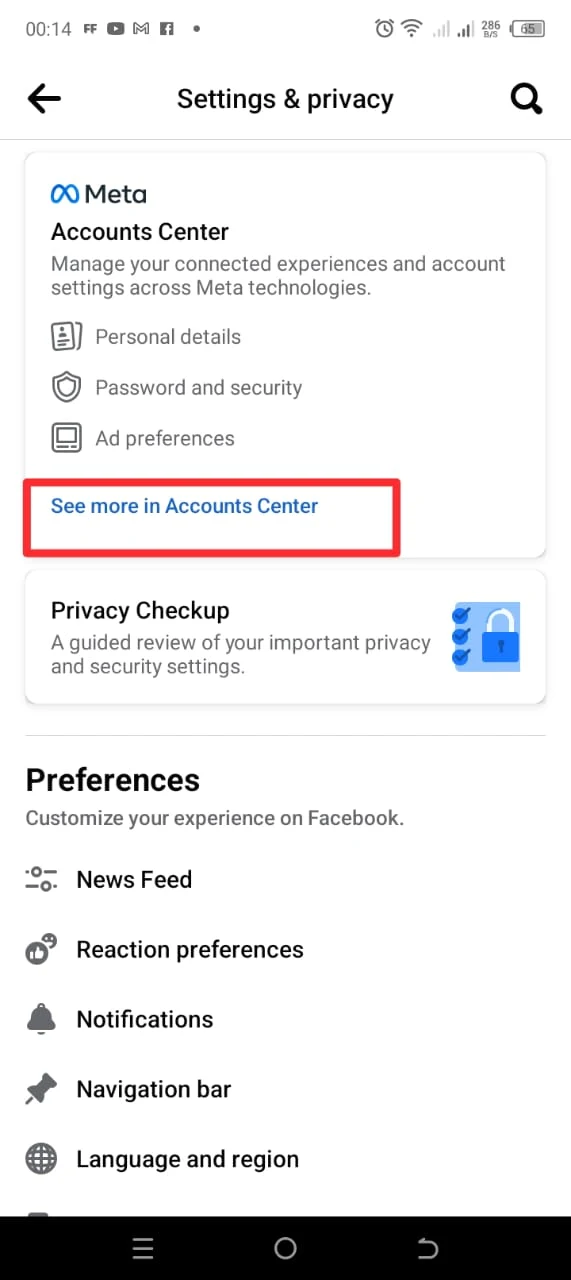
You will see the option of “see more in account centres” under the option of “account centers.” Tap on it.Step 5:
Search for the “Personal details” option amidst the list below and tap on it. In the personal details option, you will see “account ownership and control” at the bottom. Tap on this, too.Step 6:
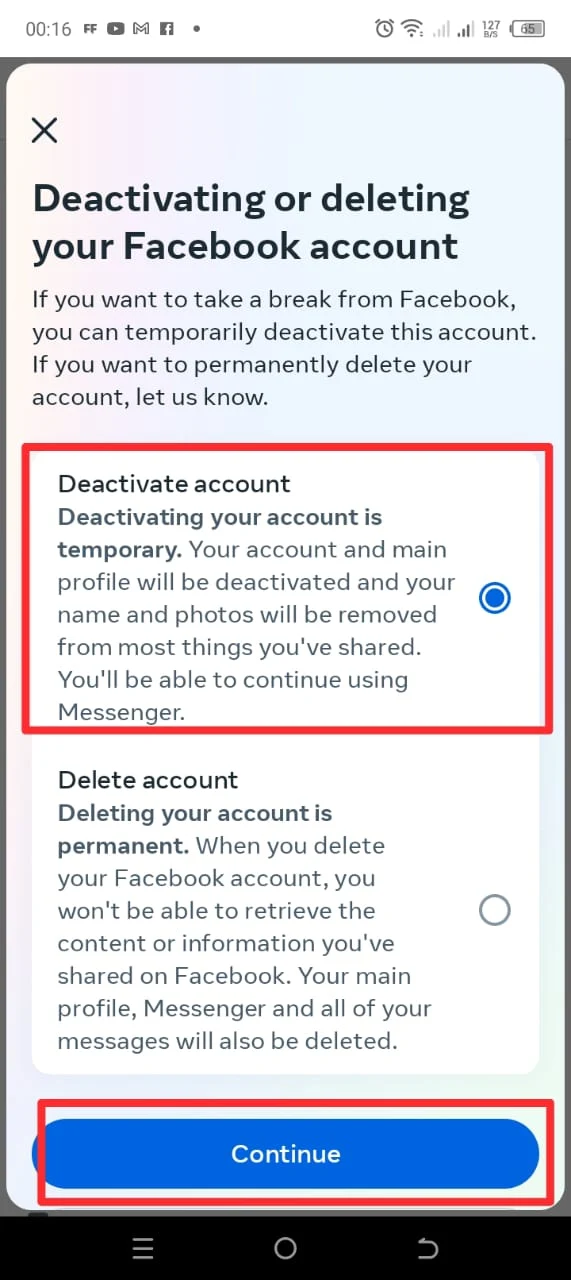
Select the account for deactivation, and select the deactivating option.Step 7:
Enter your Facebook password to proceed with the deactivation process.Deleting Your Facebook Account
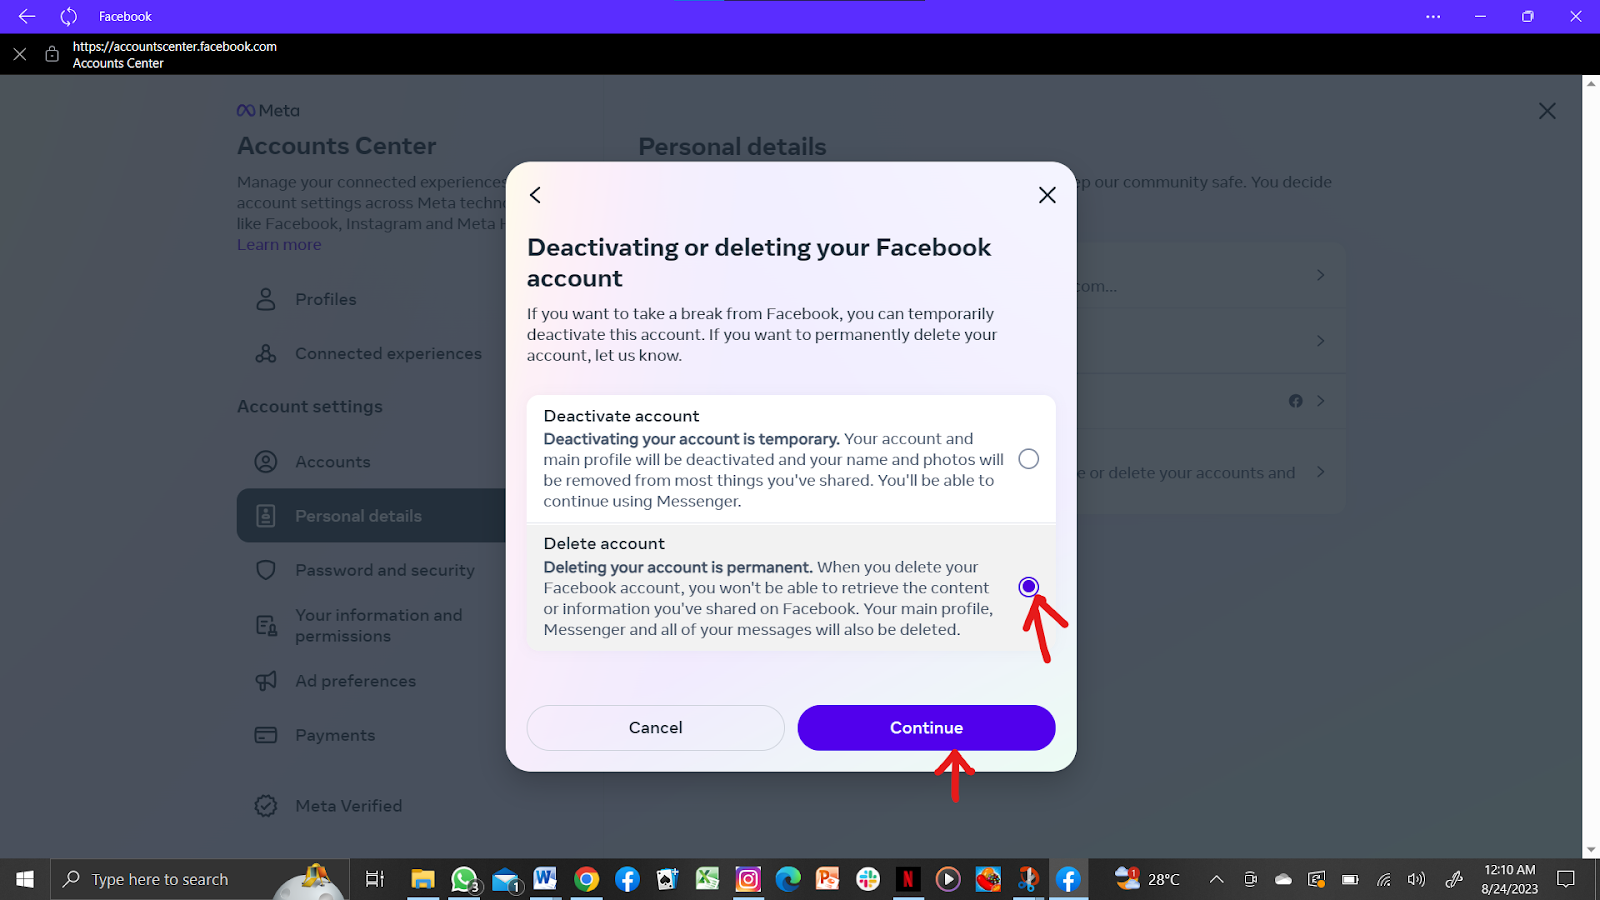
Erasing your Facebook account permanently requires careful consideration. Although the process is the same as the deactivating process. You must select “delete account” instead of “deactivating account.” Here’s a comprehensive guide to help you through the process:Deletion on Web Browser:
Step 1:
Log into your Facebook account by typing www.facebook.com in the search bar.Step 2:
Now that you have entered the Facebook account click on your profile photo, then chooseStep 3:
By entering the privacy settings, you will see another “settings” option in the list. Click on that option.Step 4:
You will see the option of “Account centers” on the left side of the screen. Look closely, and you will find “see more in the account centers.” Tap this option.Step 5:
Now, a new window is opened. Look for the “Personal details” option amidst the list below and tap on it. In the personal details option, you will see “account ownership and control” at the bottom. Tap on this, too.Step 6:
Select the account for deletion, and select the deleting option.Step 7:
Enter your Facebook password to proceed with the deleting process.Deletion on iPhone App:
Want to delete your Facebook account on Android within a few minutes? No worries, because we have got you covered. All you need to do is to follow the lead:Step 1:
Open the Facebook app.Step 2:
Tap the three-line menu and select “Settings & Privacy.”Step 3:
Under “Settings,” choose “See more in account centres.”
Step 4:
Select “personal information” and then “account ownership and control.”Step 5:
Choose an account to delete.Step 6:
Choose the deleting option and hit the “Continue” button.
Step 7:
Enter your password to confirm.There you are; deleted your account in no time.
Android App Removal:
Let’s teach you to delete your Facebook account from your Android phone; easy, mate, this won’t take long. Let’s start already:Step 1:
Run the Facebook app on your Android buddy.Step 2:
Look at the top right corner of the screen and tap the three-line menu.Step 3:
Now choose “Settings & Privacy.” It is the setting gear located in the upper right corner.Step 4:
Under “Account centres,” select “see more in account centres.”Step 5:
Tap on “personal details” and then “account ownership and control.”Step 6:
Tap on the option of “deactivation and deletion.”Step 7:
Select the second option, “Delete account,” and hit the “continue” option.Step 8:
Enter your password to confirm.Well done, my friend, you have done this all by yourself.
Investigating the Pros and Cons
Deciding between deactivation and deletion hinges on your goals and concerns:Pros of Deactivating:
Maintain Facebook Messenger access.Your account can be reactivated at any time.
Hide your stuff for the time being.
The cons of deactivating:
Personal information is not destroyed.Oculus items are not available.
When reactivated, you are vulnerable to various scams.
Pros of Deleting:
Facebook data has been completely erased.Control over personal information has been enhanced.
All related data is erased.
Cons of Removing:
A decision that cannot be reversed.Possible loss of critical media.
Keeping Messenger Active During Deactivation
Yes, you can use Facebook Messenger after canceling your account. Select the “Deactivate account” option to keep your communications capability intact.
Recovery and Reactivation
Deactivation and deletion both allow for revival within certain durations. Deactivation can be undone anytime, and deleted accounts can be restored within 30 days. Deleted accounts are permanently lost after this period.As you navigate the realm of Facebook deactivation and deletion, consider your digital priorities and concerns. Whether you seek a temporary or permanent escape, this guide equips you with the tools to safeguard your online presence and privacy.
Read next: Delete Your Instagram Account with a Simple and Fun Guide

